
I can say PHEW about all of this now. (Has anyone else noticed that I get bitten by the craft bug every winter/busy season?)
Isn't it amazing how if you really want something bad enough, you will do anything to get it? Even if it involves 6 weeks of time, a TON of acrylic paint bottles (64 to be exact), sore muscles and knees, and pull-out-your-hair patience??
Since we have lived in this house (6 years total), we have had some "nice" curtains. At least I think they were nice 20 or 30 years ago. They were straight out of the 80s. Complete with string-pull and everything. We have a huge window in the corner, as well as our sliding door. There is also another window in the room, so they all needed the same curtains.

Figuring out new curtains in this room never sounded fun. Until it suddenly DID sound like fun. I knew what I wanted - horizontal striped curtains. I love the look of black and white but knew those colors would clash with my living room. I looked at every imaginable site on the internet and could NOT find what I wanted. I even looked for fabric but I didn't love any of it, and considering I would need SIX panels that were 50x84 inches, that was pricey. I finally discovered these panels, from Crate and Barrel...
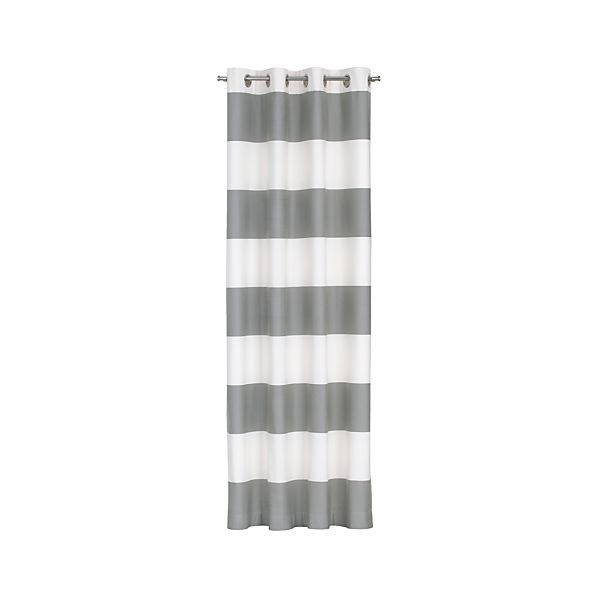
and fell in LOVE. Until I saw that they were $99 per panel! $700 after tax and shipping. For curtains!
Finally I found some tutorials that told me I could paint the stripes on myself. Um, no thanks. But I came back to those tutorials a few days later after I was feeling out of other options, and after reading for a while, made the insane decision to go for it. After all I really really wanted these curtains!
I made my way to Ikea, where I purchased 3 sets of panels ($25 for 2, by the way...unless you count the fact that in their "as is" section they had some in opened packages for $17 for 2- score!). Total cost of curtains - under $75. I like the grommet look. Then I found the rods for $12 each.
The problem with the curtains was that they were hemmed to 96 inches. So I hung them up, marked them, and then sewed the bottom. Mind you, each step of that process took a few DAYS, so this could have been much faster if I was in a different stage of life.
Next was the math part. Enter Spencer. I knew I wanted the stripes to be about 8 1/2 to 9 inches thick. He helped me figure out the most accurate measurements to keep it equal but also how to keep it how I wanted it in my mind. I made a template, measured each panel, and made pencil marks down the sides of the panels.
The next day was the tedious step of using a piece of wood to draw the pencil lines. The material was quite soft and movable so it was hard to get the lines to match up. Then came the taping. Taping is always the worst part of painting in my opinion. I also had to remember to tape on the "right" side of the line depending on if it was a painted stripe or a white stripe. I marked the not-to-paint stripes with extra tape so I didn't accidentally mess up.

What I did next is what made the stripes so perfectly straight. Mod Podge. I sealed the edges of the masking tape with Mod Podge (dries clear) so that no paint would bleed underneath. It worked almost flawlessly (don't look too close, or you will see a few places where I messed up), but it really made a huge difference in the lines.
Everyone that wrote tutorials about this used different types of paint. I decided to use acrylic paint bottles mixed with textile medium so that the painted sections wouldn't crack. The textile medium supposedly makes the curtains washable (even though I hope to never have to wash them). And it keeps the paint from (for the most part) bleeding through the material. My base color was "Pebble" and then I added a few bottles of different grays to move the shade away from being too brown.


I painted for 3 entire afternoons (over 2 1/2 weeks). One upside to this horrible drought is that the weather has been glorious. 75 degrees and sunny most days. It took WAY more paint than I was initially expecting - about 4 times more. And...because I used acrylic paint tubes and mixed them to get this taupe/greige color I was going for, I had to make sure to re-buy all the same paints the next two times I needed to paint. But after 3 (and sometimes 4) coats, they are done and I LOVE them! Not sure I can say yet that it was worth it, but I am proud that it cost under $200. And it makes the room feel big. And the color is just what I wanted.


I love the feeling of accomplishment. And the fact that I am done!


9 comments:
They look great! You are amazing. I am in the process of looking for curtains right now, but can't find the right colors. You might have just solved my problem!
LOVE the curtains!!! Worth your work I promise!! :)
LOVE the curtains!!! Worth your work I promise!! :)
Nice,Nice, Nice.Well worth it.
That looks like it was miserable, but the end result looks fantastic! =)
I can't believe you are so patient. All that work would have made me nuts!
Wow! They look great! You are amazing!
They look really great. And, so many curtains too! This project says a lot about your dedication to beauty, frugality, and finishing a goal. :)
these look great! Let me know when you're selling them on ebay. ;) ha!
Really though, you did a fantastic job. It may have been more work than you bargained for, but that feeling of accomplishment can be there anytime you look at them.
Post a Comment